 |
| Introduction: The Hidden Cost of Neglected Equipment |
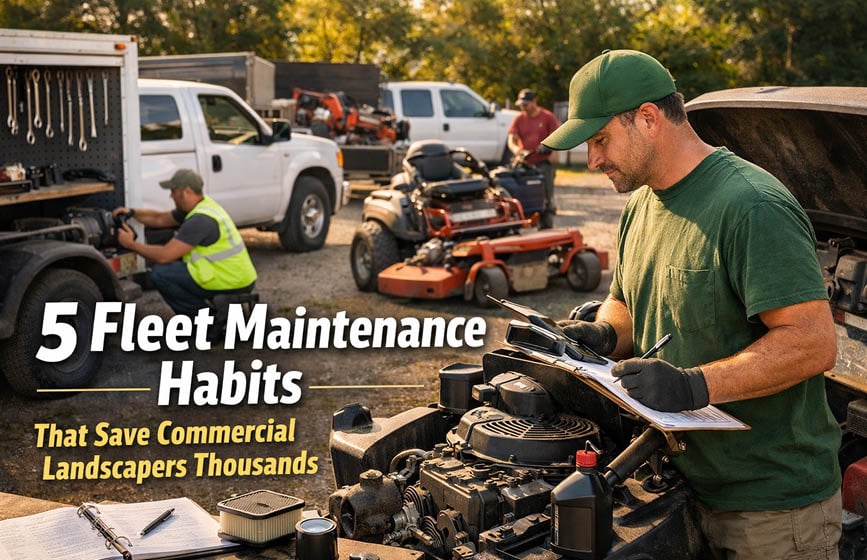
Running a commercial landscaping business is rewarding work, but it comes with a financial reality that can quietly drain your profits if you are not paying attention. Equipment breakdowns, unexpected repairs, and premature vehicle replacements are among the most common reasons landscaping companies struggle to grow, even when their client list is full and their crews are busy.
The good news is that most of these costs are preventable. The difference between a fleet that bleeds money and one that runs efficiently almost always comes down to maintenance habits, not luck. Landscapers who build consistent, proactive maintenance routines into their operations report saving anywhere from $10,000 to $50,000 annually, depending on fleet size. That is not a small number, and it adds up to real growth capital over time.
In this article, we will walk through five fleet maintenance habits that the most profitable commercial landscapers follow religiously. Whether you manage five trucks or fifty, these practices will extend the life of your equipment, reduce your downtime, and protect your bottom line.
|
| Habit 1: Implement a Scheduled Preventive Maintenance Calendar |
Reactive maintenance is the enemy of profitability. When you wait for something to break before you fix it, you always pay more, in parts, in labor, in lost time, and in missed jobs. The landscapers who consistently save the most money are the ones who treat maintenance as a scheduled business activity rather than an emergency response.
A preventive maintenance calendar should cover every piece of equipment in your fleet, from your largest commercial mowers to your utility trucks and trailers. At minimum, this calendar should include oil changes, filter replacements, belt inspections, blade sharpening, tire rotations, and fluid top-offs at manufacturer-recommended intervals.
The key is consistency. Assigning one person or a small team to own the calendar creates accountability. Many successful landscaping companies use simple fleet management software, or even a shared spreadsheet, to track service dates, mileage, and upcoming maintenance needs for each piece of equipment.
The financial impact of this habit is substantial. A small engine that receives regular oil changes can last 1,500 to 2,000 hours. The same engine that runs on dirty oil is lucky to reach 800. When you multiply that difference across an entire fleet of mowers, blowers, and trimmers, the savings on replacement costs alone can reach tens of thousands of dollars per season.
|
| Habit 2: Train Operators to Perform Daily Pre-Use Inspections |
Your equipment is only as well-maintained as the people operating it allow it to be. Even with the best preventive maintenance calendar in place, problems can develop between scheduled service dates. Daily operator inspections are the first line of defense against small issues becoming expensive failures.
A good pre-use inspection checklist takes less than five minutes to complete and should cover tire pressure, fluid levels, visible leaks, unusual sounds, belt tension, blade condition, and any warning lights on the dashboard. For trucks and trailers, operators should also check hitch connections, lighting, and brake function.
Operators who are trained to notice and report problems early give your maintenance team the chance to address issues before they escalate. A worn belt caught during a morning check costs $30 to replace. That same belt, left unaddressed until it snaps mid-job, can cause downstream damage to pulleys and spindles that runs into hundreds of dollars, not to mention the cost of pulling a crew off-site.
Beyond the mechanical benefits, daily inspections create a culture of ownership among your operators. When employees feel responsible for the condition of their equipment, they tend to use it more carefully and report issues more promptly. That behavioral shift alone has measurable financial value.
|
| Habit 3: Keep Air Filtration and Engine Intake Systems Clean |
Landscaping environments are among the harshest on the planet for engines and air filtration systems. Grass clippings, mulch dust, fine soil particles, and pollen circulate through the air constantly during a working day. Every piece of equipment on your fleet is drawing contaminated air into its engine intake, and if your filtration systems are not cleaned and replaced on a rigorous schedule, you will pay for it in accelerated engine wear and reduced performance.
Air filters on commercial mowers and small engines should be inspected daily and replaced or cleaned weekly during heavy use periods. Trucks and larger vehicles require attention to their air intake systems on a regular basis as well. Companies that operate in dusty, arid regions face an even greater challenge, much like how facilities in dry climates (such as those seeking air duct cleaning salt lake city services) understand that particulate buildup in enclosed systems is a persistent maintenance challenge that demands proactive management rather than reactive repair.
Clogged air filters reduce fuel efficiency, increase engine temperature, and force components to work harder under load. Studies from small engine manufacturers consistently show that running equipment with a dirty air filter can reduce fuel efficiency by 10 to 15 percent and shorten engine life by 20 to 30 percent. On a fleet with 20 mowers burning significant quantities of fuel per season, those numbers translate directly into thousands of dollars of avoidable expense.
Pair your air filtration habit with regular checks of cooling fins and engine shrouds. Landscaping equipment accumulates debris in these areas rapidly, and blocked cooling passages cause overheating, which is one of the leading causes of premature engine failure in the industry.
|
| Habit 4: Maintain a Detailed Maintenance Log for Every Asset |
Data is one of the most underused tools in fleet management for small and mid-sized landscaping companies. Many operators rely on memory or informal notes to track service history, which creates gaps and inconsistencies that cost money in the long run.
A detailed maintenance log for every vehicle and piece of equipment in your fleet gives you several powerful advantages. First, it allows you to identify patterns. If a specific mower requires a belt replacement every six weeks instead of every twelve, that is a signal worth investigating. It might indicate an operator technique issue, a misalignment problem, or a component that is not properly sized for the workload. Catching that pattern through a log lets you fix the root cause rather than simply replacing parts on a loop.
Second, detailed logs protect your resale value. A commercial zero-turn mower with a full service history commands a meaningfully higher resale price than an identical machine with no documentation. When you replace fleet assets every three to five years, as most growing landscaping companies do, that difference in resale value adds up quickly across your entire fleet.
Third, maintenance logs help you make smarter decisions about repair versus replace. When you can see that a truck has required $4,000 in repairs over the past 18 months and is approaching a major service milestone, you have the data you need to make a financially sound decision rather than an emotionally driven one.
Modern fleet management apps make logging easy. Even basic tools like Fleetio, Samsara, or a well-organized spreadsheet system can give you the visibility you need to manage costs intelligently.
|
| Habit 5: Establish Vendor Relationships and Negotiate Service Contracts |
Independent landscapers often pay full retail rates for parts and repairs simply because they have not taken the time to build relationships with suppliers and service providers. Commercial landscaping companies that operate profitably at scale treat their vendor relationships as a strategic asset.
Start with your equipment dealers. Most dealers offer service contracts or priority scheduling for commercial accounts that commit to using their service department. These contracts often include discounted labor rates, priority parts ordering, and loaner equipment provisions during repairs. When your mower is down during peak season and a competitor is waiting three weeks for service, a preferred vendor relationship can mean the difference between retaining a client and losing one.
Do the same with your parts suppliers. Buying in bulk for consumables like blades, belts, filters, and spark plugs almost always yields discounts of 15 to 25 percent compared to buying as needed. Consolidate your purchasing with one or two trusted suppliers, communicate your expected volume, and ask for a commercial pricing structure. Most suppliers will accommodate the request.
Finally, consider establishing relationships with diesel and fuel suppliers if your fleet is large enough to justify bulk fuel purchasing. Fuel costs represent a significant operating expense for commercial landscapers, and locking in negotiated rates or pre-purchasing at favorable prices during off-peak periods can produce meaningful savings over a full season.
|
| Conclusion: Maintenance Is a Profit Strategy |
The most successful commercial landscaping companies do not view fleet maintenance as an expense; they view it as an investment. Every dollar spent on scheduled maintenance, operator training, filtration upkeep, documentation, and vendor relationships returns multiple dollars in avoided repairs, extended equipment life, and reduced downtime.
Building these five habits into your operation does not require a large budget or a dedicated fleet manager. It requires consistency, accountability, and a shift in mindset from reactive to proactive. Start with one habit, build a system around it, and add the others progressively.
The landscapers who master their equipment costs create a durable competitive advantage. They bid more confidently, operate leaner, and reinvest savings into growth rather than burning them on avoidable repairs.
|