ProParts Direct

A Homeowner’s Guide to Winterizing: Inside & Out


By Guest Blogger Carrie Spencer
Winterizing a home is one of those tasks that few people enjoy. It’s not so much the work but the departure of the warmer months that makes folks dread it. However, making sure all the right steps are taken, both inside and out, can save money and reduce the time it takes to transition items back into use during the warmer months. Here are a few considerations to prepare your residence for colder weather, whether you are a homeowner, renter, or caretaker.
Outside
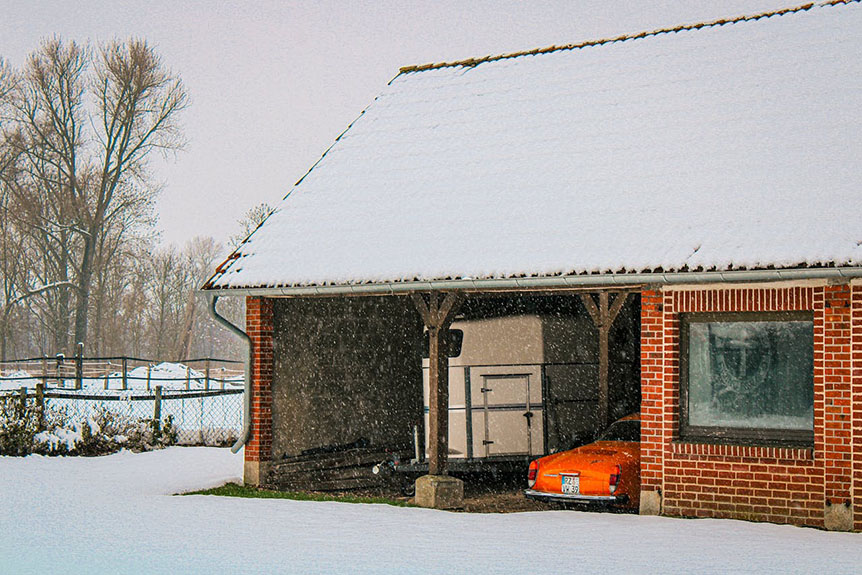
It’s important to shield the home against winter weather. Keep in mind that while completing these tasks can become increasingly difficult as it gets colder, embracing the colder winter season and spending time outdoors can give your mood a boost.
Tidy the yard. In addition to mulching leaves, getting in that final mow, fertilizing, and cutting back plants. It’s also important to cut down any dead tree limbs since they have the potential to come down on a fence, deck, or other structure, or possibly even the house in the event of a severe winter storm.
Store outdoor items. This includes lawn and patio furniture, grills, garden hoses, tools, and any toys, balls, or other fitness equipment that might be left in the yard. Disconnecting garden hoses from the spigot is really important to avoid the possibility of having the spigot freeze and rupture. Depending on your climate, covering your grill and furniture may suffice, but storing it along with any tools and outside toys in a garage or shed will increase its longevity.
Prep water features. If you have a koi pond, fountain, swimming pool, or hot tub, you likely already know the hazards of not properly winterizing these items. Koi can live through the winter months in a pond as long as there is air circulating, but fountains should be drained and stored to avoid potential damage. To save water, consider purchasing a cover for your pool or hot tub rather than draining it. Always use proper pool supplies to treat the water before you cover it for winter and return it to use in summer.
Maintain outdoor structures. If your yard is fenced, or you have a porch or deck, inspect and perform structural maintenance on these items. Save painting and aesthetic issues for the warmer months, but freezing and thawing cycles throughout the winter can exacerbate structural issues.
Add home security features. Before it gets too cold, now is a good time to focus on home security. Incorporating features such as smart cameras, smart locks, and smart lights can protect your home so you can sleep easier at night.
Inside
While many of these items can be done after the cold arrives, taking care of them early reduces the potential costs. The following indoor maintenance suggestions are for the ones that pose the greatest risk to the home itself and should not be neglected.
Inspect and replace seals. Drafty doors and windows are winter budget busters. To ensure warm air isn’t escaping, it is important to inspect the seals around your doors and windows. Don’t forget to take a look at your outlets as well. Those on exterior walls in particular can let in a lot of cold air. Use foam sheets to seal up any that may be a problem. It is also a good idea to consider putting plastic on windows and to close off rooms that are not being used.
Maintain heat sources. Furnaces, fireplaces, and wood stoves should all be maintained annually by a licensed professional. Failing to properly maintain these items not only increases the risk of being without heat during the coldest part of the year, but it increases the risk of fire. If temperatures fall below freezing in your area, you are also at increased risk of frozen or ruptured pipes inside your home.
Test detectors and extinguishers. Every home should have smoke detectors, carbon monoxide detectors, and at least two fire extinguishers. Replace batteries and test your smoke detectors and carbon monoxide detectors. Smoke detectors need to be replaced regularly as well, and each home should have one in the kitchen and near the furnace, fireplace, or woodstove.
These are all relatively simple tasks that most homeowners can tackle themselves. Consider hiring a professional to maintain heat sources and for removing large limbs from trees if needed. Making a proper effort to winterize your home will ensure no major maintenance is required mid-winter or in the spring.
Visit ProParts Direct to find quality parts for lawnmowers, chainsaws, engines, snowblowers, and landscaping equipment!
Photo Credit: Pexels.com

5 Must-Do Steps for Growing Your Very First Garden

Do you need parts for your small-engine equipment? ProParts Direct is your one-stop parts store for lawn mowers, chainsaws, engines, snow blowers and all landscaping equipment. Reach out to us today! 800-305-9255
By Guest Blogger Carrie Spencer
Looking to give your green thumb a workout as the weather warms up? If you are new to gardening, you should know that preparation is key to success. It can feel a bit overwhelming, so if you’re not sure where to start, these essential steps from ProParts Direct can help you get started.
Ask Experts for Gardening Advice & Tips
Before you plant your first seeds, you may want to think about your reasons for gardening in the first place. If you just want a beautiful garden and don’t want to worry about all of the work, hiring a gardener may be your best bet to ensure you get started out on the right foot.
A professional gardener will be able to help you plan a garden that works for your yard and your area, and he/she can provide the level of care needed to maintain it. Even if you do not want to hire a full-time gardener, consulting with one can be a good way to get your first garden off to a healthy start.
Research Local Climates and Growing Zones
If you have never attempted to grow a garden before, you may want to start with simple plants that are easy to take care of in order to avoid added stress or expenses.
The first step in selecting plants is checking USDA recommendations to see which growing zone you are located in and when to begin planting. This is crucial, because planting too early or late can lead to dying plants or plants that do not produce flowers, veggies or fruits.
In addition to knowing your growing zone, you should also research what sort of plants will work best in your location. For example, Preston Trail Farms notes that most crop plants require good drainage. On the flip side, some plants love to keep their feet wet, so a little research will definitely go a long way toward your success.
Build a Fence for Your Backyard
If you haven’t already done so, now’s the perfect time to add a fence to your backyard. Not only will a fence help add value to your home, but it will also protect your garden from any four-legged critters who may wander into your backyard and help themselves to your plants. Fortunately, you can use websites like Angi to connect with top-rated fence builders near you who can help you build that fence quickly and efficiently — all you have to do is read reviews and select one you feel can get the job done correctly.
Buy Started Plants Instead of Starting With Seeds
Another helpful tip that can help novice gardeners succeed with their first planting is to go with more developed plants rather than attempting to grow plants from seeds. Growing seedlings can seem like a simple enough task, but you will need to start plants much earlier, and very young plants can end up wilting in the sun or even blowing away in strong winds. Connecting with a garden center or nursery for started plants can ease a lot of first-time gardening woes. Also, many stores offer return and/or exchange policies if your plants end up dying too quickly, so be sure to ask about these sort of plant guarantees before you check out.
Spend Some Serious Time Properly Preparing Soil
Some plants will thrive in just about any sort of spot you plant them while others require the right amount of sun, soil and water to even survive. If you plan on growing veggies or flowers in your new garden, know that most of these plants need quality soil in order to flourish. Before you begin planting your vegetables and flowers, you may need to dedicate some time to soil prep.
For a vegetable garden, Family Handyman points out that preparing your soil for maximum health and output can include tilling and double-digging in order to ensure proper drainage and aeration. Having the right mixture of soil can also improve your vegetable garden but some experts and experienced gardeners also rely on worms to improve their soil quality.
Growing a garden can be a perfect way to pass time, boost curb appeal, and even grow healthy food. So make sure your first garden gets off to a healthy start by applying some TLC and connecting with help as needed. Then all that will be left to do is to plant your garden, care for it and watch it grow.
Photo Credit: Pexels.

Keeping Overwintering Insects Away From Your Home and Lawn


By Guest Blogger Raymond Web
With the setting of the winter sun, even the bugs and insects seek shelter to keep warm. Unfortunately for home and business owners with beautiful lawns, this becomes an issue since their spaces get invaded by Asian lady beetles, boxelder bugs, cluster flies, stink bugs, ladybugs, boxelder bugs, and many more. These pests cause nuisance with their large populations emerging out of their hiding spaces as soon as they discover some warmth. Overwintering insects also include bees and wasps in winters. The next part of the article will uncover more information on the prevention of these uninvited guests.
What is Overwintering?
Overwintering defines the act with which insects, plants and animals, seek shelter inside warmer places during peak winter months. Since this article focuses on insects, overwintering in their lifecycle denotes a time when they search for more conducive spaces for survival during winters when the cold halts their growth and development.
Types of Overwintering Pests
Consider this section as an introduction to the variety of overwintering insects you are likely to find lurking in the nooks and crevices in your house. You will encounter them sneaking out when they discover warmer temperatures and determining them becomes crucial to decide the appropriate pest control measure. These include:
  • Spiders - Although most house spider species are harmless if left alone, it is crucial to know how to handle their infestation to prevent any terrifying encounters.
  • Termites - Prioritizing termite inspection in order to avoid hefty property damage is in your hands because these overpopulating insects seek comfortable shelters to reproduce during the winters.
  • Grubs - These plump, white, C-shaped creatures feast on the roots in your lawn, thereby destroying the soil structure.
  • Ants - While living in colonies, ants seek shelter and food to keep them alive in the cold climate.
  • Fleas and Ticks - These minuscule creatures usually climb onto pets and eventually lay eggs onto furniture and carpets.
  • Chinch bugs - They feed on the fresh grass in your lawn, which eventually starts to turn brown as a sign of damage and death.
  • Brown Marmorated Stink bugs - It is the mid-Atlantic regions that suffer from the arrival of stinkbugs which feed on crops.
  • Cockroaches - These creepy crawlers have successfully habituated themselves to the changing environment and can survive even the harshest of climates. Act promptly, when you find them in your home to avoid larger population gathering.
  • Crickets - You will often find crickets silently lurking in the sealed gaps of your doors and windows during winters for warmth.
  • Boxelder Bugs - This North-American species of bugs live on Boxelder, maple, and ash trees and seek shelter inside closed spaces during the colder months.
  • Cluster Flies - As the name suggests, these insects arrive in clusters to escape via windows and can be exceedingly annoying.
How to Prevent Infestation of Overwintering Pests?
  • Invest in Professional Help - Pest control services and their trained experts would tactfully handle the situation of overwintering insects in your home and lawn before it instigates into a bigger problem.
  • Store Food Properly - Food being one of the primary sources of survival for most of the insects mentioned above, you need to be extra careful when storing it in the open. Double-check the seals and use airtight containers even in the refrigerators.
  • Seal the Gaps - Performing a spot check and sealing the gaps, cracks and holes in the wooden panels of your doors and windows would instantly lower the chances of overwintering pests in your house.
  • Move Trees, Bushes, Shrubs, and Firewood Away - Trim and maintain these natural habitats which are ideal winter homes for overwintering insects. Steer clear of fuelling the issue by placing them away from doors and windows.
  • Choose to landscape for a pest-free lawn - Having a clean, pest-free yard is essential to save your home from these insects during winters. There is a wide range of landscaping ideas you can cater to as an escape from common lawn-pests.

While live and let live is a great motto considering nature and its many creatures, it is crucial to saving oneself from the spread of diseases that might arrive with these overwintering insects. Hopefully, this resource has helped you with actionable solutions.
Author Bio: When people find their homes and offices infested with pests, it is not uncommon for them to panic. Raymond Web has taken the task to educate people on pest prevention and control strategies helping them keep their surroundings healthy, safe and pest-free. Being the digital marketing manager for Take Care Termite and Pest Control, a top rated pest control service in Tracy, CA, he has an in-depth understanding of people and their pain points due to pests, which he uses in his content to educate.

How to Replace a Dingo Track

Servicing the Tracks

Check the tracks for excessive wear and clean them periodically. If the tracks are worn, replace them.
Cleaning the Tracks
1. With a bucket on the loader arms, lower the
bucket to the ground so that the front of the traction unit lifts off of the ground a few inches.
2. Stop the engine, and remove the key.
3. Using a water hose or pressure washer, remove
dirt from each track system.
IMPORTANT: Ensure that you fully clean the road wheels, the tension wheel, and the drive sprocket (Fig. 29). The road wheels should rotate freely when clean.

Replacing the Tracks
When the tracks are badly worn, replace them.
1. Lower the loader arms, stop the engine, and remove the key.
2. Lift/support the side of the unit to be worked on so that the track is three to four inches (7.6 to 10 cm.) off of the ground.
3. Remove the locking bolt and nut (Fig. 30).
4. Using a 1/2 in. drive socket, release the drive tension by turning the tensioning screw clockwise (Fig. 30 and 31).
5. Push the tension wheel toward the rear of the unit to move the fork tube against the frame (Fig. 31). (If it does not touch the frame, continue turning the tensioning screw until it does.)
6. Begin removing the track at the top of the tension wheel, peeling it off of the wheel while rotating the track forwards.
7. When the track is off of the tension wheel, remove it from the drive sprocket and road wheels (Fig. 31).
8. Beginning at the drive sprocket, coil the new track around the sprocket, ensuring that the lugs on the track fit between the spacers on the sprocket (Fig. 31).
9. Push the track under and between the road wheels (Fig. 31).
10. Starting at the bottom of the tension wheel, install the track around the wheel by rotating the track rearward while pushing the lugs into the wheel.
11. Turn the tensioning screw counter-clockwise until the distance between the tension nut and the back of the fork tube (Fig. 32) is 2 3/4 in. (7 cm.).
12. Align the closest notch in the tension screw to the locking bolt hole and secure the screw with the locking bolt and nut.
13. Lower the traction unit to the ground.
14. Repeat steps 2 through 13 to replace the other track

2015 © ProParts Direct. All Rights Reserved. Privacy Policy | Site Map Design & Development by The Scribbit The Scribbit - Marketing, Graphic Design and Web Development