 |
| Quick Snapshot |
”It is important to choose tiles with good durability, safety, and style when it comes to high-traffic areas outside. Depending on whether the tiles will be used on a patio, a walkway, or around a pool, it is essential to select tiles that are slip-resistant, waterproof, and low-maintenance, so that their beauty and practicality endure through daily use.”
The design or remodelling of an outdoor space with high foot traffic needs to be critically appraised, and the selection of the right wooden tiles for outdoor plays a key role. Have you ever considered which tiles will not only withstand continual pressure but also enhance the appearance of your patio, walkway, or driveway? Outdoor tiles must be rugged, non-slip, and easy to clean, while also being visually appealing for the space they cover. This guide will help you find the most suitable tiles fitting all these requirements, so that your outdoor spaces remain serviceable, fashionable, and gorgeous this year and forever. |
| Understanding the Importance of Choosing the Right Tile for High-Traffic Outdoor Areas |
Choosing the appropriate tile for high-traffic outdoor areas is a crucial decision, as these areas endure significant wear and tear from heavy foot traffic, vehicles, and other elements of the environment. The proper tile must be durable, because this will ensure that the tile remains intact despite constant use. Tiles should be selected with the intention of consistently facing moisture, dirt, and outdoor conditions without compromising their beauty.
Moreover, these tiles should be well-maintained, as cleaning and maintenance play a crucial role in high-traffic zones. An erroneous selection of tiles may result in regular replacement, high repair costs, and even safety risks, such as slippery floors. In addition to being durable, they require safety features, such as slip-resistant properties, to ensure their safety even when wet. When choosing tiles, opt for those that create a long-lasting, beautiful, and functional outdoor space in a manner that is both practical and safe.
|
| Key Characteristics of Outdoor Tiles for High-Traffic Spaces |
| When choosing tiles to use on a high-traffic outdoor area, your primary consideration should be features that will guarantee the tiles stand up to continual traffic, without compromising protection and aesthetic appeal. With the following factors in mind, you can make a well-informed decision that will stand the test of time. |
Durability
High-traffic outdoor areas require high durability. Porcelain and natural stone materials will be of tremendous strength, which are able to defy abrasion and impact. These products are designed to withstand high pedestrian traffic and adverse weather conditions, allowing the tiles to last for years before requiring frequent replacement. |
Slip Resistance
Slip resistance is essential, especially in wet weather, for safety. The exterior tile must either have an anti-slip treatment or a textured surface, which will minimize the risk of slipping during rain or around pools. Such extra protection layers create a safer walking surface for all individuals, thereby reducing accidents and personal injuries. |
Weather Resistance
The tiles used in high-traffic areas must be able to withstand all the elements. Choose the material with extreme temperature resistance (porcelain or stone tiles that are temperature-resistant to frost). They are tolerant of extreme cold, dense heat, and rain, and leave your outside space intact throughout the year. |
Low Maintenance
Outdoor tiles with heavy use should be simple to wash and maintain, reducing the need for cleaning and maintenance work. Select stain-proof tiles or tiles that do not require regular resealing. Outdoor maintenance tiles can give the area a clean look, and they do not need a lot of additional maintenance, which is both time- and labour-efficient. |
| Porcelain Tiles: Your Best Bet on Durability and Beauty |
| One of the best choices for heavy-traffic outdoor areas is porcelain tile. Porcelain tiles are made from denser clay that has been fired at higher temperatures compared to ordinary ceramic tiles, making them extraordinarily hard and immune to moisture and temperature variations. They can withstand a lot of pressure, making them ideal for use on walkways, patios, and even driveways where a lot of walking is involved. |
| Why Choose Porcelain Tiles for Outdoor Areas? |
Great scratch and chip resistance
Porcelain tiles are exceptionally durable and resistant to scratches and chips. They do not easily wear down, and their hard surface withstands high-traffic areas for extended periods; therefore, they are a great choice for areas where wear and tear may be a main concern due to foot traffic or heavy furniture movement. |
Water-resistant
The low water absorption rate of porcelain tiles makes them the best choice for locations that receive moisture. It could be a poolside patio or a muddy pathway, but porcelain tiles do not absorb any water, keeping out problems such as stains, cracks, or mold growth. |
Versatile designs
There is so much variety in the style, color, and finishes of porcelain tiles, and they offer versatility in design. Whether it’s the natural stone feel, dramatic contemporary designs, or traditional finishes, porcelain tiles can add beauty to any outside walls.
However, remember to choose a porcelain tile with a textured surface to make sure it is not slippery. One reason is that smooth porcelain becomes very slippery when wet.
|
| Natural Stone Tiles: Unwavering Functionality and Timeless Beauty |
| Granite, slate, and travertine are natural stone tiles known for both their timeless beauty and exceptional strength in high-traffic outdoor areas. The tiles are considered perfect for use in patios, walkways, and driveways, and they are prone to heavy usage because of their unique beauty and durability. Their lasting capabilities, coupled with their aesthetic appeal, make them irresistible, although they are quite pricey compared to some alternatives. |
| Why Choose Natural Stone Tiles? |
Aesthetic appeal
Natural stones are all unique, and each of them presents a distinct appearance that other materials cannot replicate. The organic, premium elements provided by the natural veins and textures of granite and slate stones help enhance the appearance of any outside area by adding a sense of exclusivity to the landscape. |
Longevity
Natural stone tiles are also considered durable and can last for decades, as long as they are properly maintained. They are also a long-term investment in high-traffic areas, with high resistance to wear, weathering, and fading, and, therefore, the necessity to use such products quite often is minimal. |
Heat resistance
Granite stones and travertine are naturally heat-sensitive, making them ideal for sunlit outdoor areas, like patios and exterior kitchens. These tiles are very stable and supportive in their structure, and they are cool to walk on even during hot temperatures.
Yet, there needs to be a suitable sealing of natural stone tiles to prevent them from being stained or to protect the tiles against moisture intrusion. It is part of the maintenance that ensures their long life when they are placed in heavily exposed spaces outdoors.
|
| Ceramic Tiles: Affordable and Stylish Option for Outdoor Spaces |
| Ceramic tiles are an affordable and low-maintenance option for covering high-traffic outdoor areas and offer a wide variety of designs. Ceramic tiles are not as durable as porcelain or natural stone. However, they can still provide excellent outdoor performance when chosen properly, which is why this option has become a favorable and affordable choice. |
| Why Choose Ceramic Tiles for High-Traffic Outdoor Spaces? |
Cost-effective
Porcelain tiles and natural stone are generally more costly than ceramic tiles, making them a more expensive alternative when homeowners require fashionable outdoor establishments. Nevertheless, ceramic tiles are impressive performers, given careful selection, in both terms of durability and style flexibility. |
Clean and easy to maintain
Ceramic tiles are very easy to clean, and maintaining them is a relatively straightforward task. Being smooth and non-porous, they are dirt and stain-resistant, and thus can be used in areas that are highly trafficked, such as patios or walkways, where quick cleaning is necessary to maintain their unblemished appearance. |
Diversity of designs
Ceramic tiles are available in a broad variety of aesthetic choices, including multicolored tiles and elaborate patterns that can complement any outdoor design. This color range will allow homeowners to coordinate their ceramic tiles with the rest of their area, and there are unlimited possibilities for designing outdoor spaces stylishly. |
| Concrete Tiles: A Durable and Flexible Method of Decorating the Outdoors |
| Concrete tiles offer durability and flexibility, making them ideal for high-traffic outdoor locations. Known and appreciated for their toughness and solidity, combined with numerous design possibilities, concrete tiles are considered a middle ground between functionality and visual appeal, which makes them an excellent alternative for use in areas that are regularly used and exposed to weather. |
| What are the Reasons to Install Concrete Tiles in High-Traffic Outdoor Areas? |
Durability
Concrete tiles are very long-lasting and wear-resistant. They work quite effectively in the rush of traffic and extreme weather conditions, including rain and heat. When well-sealed and taken care of, concrete tiles are durable both structurally and aesthetically, even in the harshest conditions. |
Customizable designs
Concrete tiles are highly customizable, offering an outstanding level of versatility, which makes them a good option for outdoor spaces that need a customized look. They can be manufactured in different colors, textures, and even finishes, thus permitting homeowners to create a personal and individualized outdoor space that matches their style. |
Cost-effective
Concrete tiles are less expensive than other large-scale outdoor materials such as natural stone or porcelain. They are a great value, and in most cases, they have long-term durability at a lower initial price compared to other fine materials. |
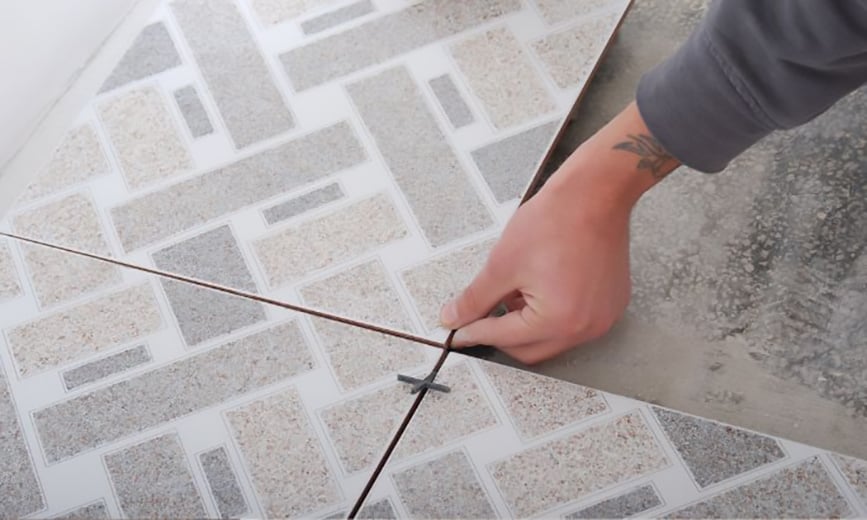
| The Importance of Tile Size and Layout in High-Traffic Areas |
| The dimensions and pattern of outdoor tiles can have a considerable influence on the functionality and appearance of high-traffic zones. In tile selection, it is important to consider the space’s purpose, the foot traffic it will experience, and the overall design. A balance of aesthetics and functionality yields a long-lasting and visually appealing outcome. |
Large Tiles
Using large tiles can create an open and seamless appearance, making the space larger and generous. They are less demanding to clean since they have fewer grout lines. This is particularly useful in high-traffic areas. They can, however, not be as slip-resistant as smaller tiles; therefore, use large, textured tiles to ensure safety. |
Smaller Tiles
Small tiles, such as mosaics, offer a variety of details and exclusive designs that can enhance and enrich the aesthetic appeal of an exterior area. They provide increased traction and, hence, are safer to use in regions that receive water. However, they have more grout lines, which may trap dirt and may need more time to clean.
Large and small tiles should be chosen according to the layout, traffic, and the design. An aesthetically and functionally balanced strike can make your project most suitable and fit, both time-tested and satisfying in style. |
| Choosing Tiles with Slip Resistance for Safety |
| In areas involved in high foot traffic, such as outdoor spaces prone to wet conditions, safety is an essential consideration when choosing tiles. Slippery tile has a lot of dangers, and as a damp tile, it can become extremely slippery in a short period. As a workaround, focus on selecting highly slip-resistant tiles, which can be identified by inspecting their coefficient of friction (COF) value, an indicator of the tile’s resistance to slipping. For outdoor areas, make sure to use a tile with a COF of 0.60 or above. |
Textured Tiles
Textured tiles are a practical choice for slip resistance. The texture itself creates friction on the surface, helping to prevent slips during wet weather. Texture tiles have greater traction, and they are especially helpful in outdoor locations, like pool decks and patios, as well as walkways, whether made of stone or porcelain. |
Anti-Slip Coatings
Specific anti-slip coatings are applied to certain tiles to enhance the traction. There are some coatings applied to the surface area that offer extra grip, even during rain or near demure pools. They need to ensure that it is strong and long-lasting, as it can be easily lost due to exposure to moisture. |
Matte Finishes
Tiles with a matte finish are less slippery than those with a glossy finish and are therefore suitable for areas with moderate traffic, such as outdoor spaces. They have a non-reflective surface, which limits the possibility of slipping, and provide a good grip in wet conditions. Matte tiles are an ideal choice for a workplace, like an outdoor kitchen or a garden pathway.
Tiles used on high-moisture surfaces, such as around pools or patios, should have adequate slip-resistant features to ensure safety. Such measures ensure safety and also optimize the overall outdoor view.
|
| The Maintenance of High-Traffic Outdoor Tiles |
| Although choosing durable tiles for high-traffic areas, such as outdoor spaces, is essential, effective treatment and maintenance are crucial to maintaining their appearance and long life. Proper maintenance would help them avoid dirt, moisture, and daily wear and tear, which will keep your tiles continuing to perform well over time and remain visually appealing. |
Clean Regularly
Outdoor tiles should be cleaned regularly to preserve their appearance and minimize the possibility of scratches or stains caused by dirt and debris. To eliminate dust and debris, sweep the surface regularly. To get an intensive clean, simply use a bit of detergent (diluted in water) to clean the tiles gently but still maintain their freshness. |
Seal Tiles
Certain porcelain tiles and natural stone tiles should be sealed to protect against moisture, stains, and dirt. Sealing also aids in establishing a protective layer, which prevents the absorption of water and, in the long run, causes upheaval. Ensure that you seal according to the manufacturer’s directions to provide the best possible protection in terms of frequency. |
Inspect Damage
Check your tiles periodically to see if there are any cracks, chips, or loose edges, especially in high-traffic areas. Cracks and pits can be repaired at an early stage, thereby avoiding further damage to the surface and making it smooth and safe. By addressing the problems at an early stage, the durability of your tiles will be prolonged, allowing you to use them for a longer period.
Regular cleaning, sealing, and checking of tiles, especially outdoor tiles, helps them last longer. Even with high traffic, they manage to stay in top shape by internalizing the full-time use.
|
| Closing Up: Making the Right Choice for Your High-Traffic Outdoor Space |
| Choosing the right tiles for high-traffic outdoor areas is crucial for ensuring both long-lasting beauty and functionality, as well as safety. Once you choose a long-lasting porcelain, exquisite natural stone, or affordable ceramic tiles, remember to emphasize their slip-resistant character, resistance to weathering, as well as carefree maintenance. With the right choice, your outdoor space can stand up to daily wear while enhancing your home’s aesthetic. Ready to transform your outdoor area? Take a look at what kind of tiles are available and find the one that fits perfectly to create a space where style, strength, and safety come together. |