 |
There is nothing more frustrating than pulling the starter cord on your chainsaw or trimmer, only to be met with a sluggish sputter, rough idling, or a complete refusal to start. Before you haul it off to a repair shop or start shopping for a replacement, consider this: the problem is almost always hiding inside the carburetor. A dirty carburetor is one of the most common reasons small outdoor power equipment underperforms, and the good news is that cleaning it yourself is a straightforward job that most homeowners can handle with basic tools and a little patience.
This guide walks you through everything you need to know about carburetor cleaning, from understanding why carburetors get dirty in the first place, to a step-by-step cleaning process, to tips for keeping your equipment running strong all season long. Whether you own a chainsaw, a string trimmer, a leaf blower, or a hedge trimmer, the principles here apply across the board.
|
| Why Carburetors Get Dirty and What Happens When They Do |
The carburetor is the heart of your small engine. Its job is to mix fuel and air in precisely the right ratio before delivering that mixture to the engine's combustion chamber. When this ratio is off, even slightly, the engine runs poorly or not at all.
The primary culprit behind a dirty carburetor is old or stale fuel. Gasoline begins to degrade within 30 days, especially ethanol-blended fuel, which is standard at most gas stations today. As fuel sits in the tank or carburetor, it evaporates partially, leaving behind a sticky, varnish-like residue. This residue coats the inside of the carburetor and clogs the tiny passages, jets, and ports that control fuel flow. The result is a restricted or inconsistent fuel supply that causes the engine to run rough, stall, lose power, or refuse to start entirely.
Other contributing factors include debris, dust, and small particles entering the fuel system through a worn or dirty air filter. Even trace amounts of contamination can clog the needle valve or emulsion tube inside the carburetor. In regions with extreme seasonal changes, fuel left sitting over winter months is almost guaranteed to cause carburetor problems by spring.
Signs your carburetor needs cleaning include hard starting, rough idling, the engine dying when throttled, black smoke from the exhaust, and unusually high fuel consumption. If your chainsaw or trimmer is showing any of these symptoms, cleaning the carburetor should be your first troubleshooting step.
|
| Tools and Supplies You Will Need Before You Start |
Good preparation makes carburetor cleaning faster and far less stressful. Gather everything before you begin so you are not hunting for parts mid-disassembly.
You will need a set of small flat-head and Phillips screwdrivers, needle-nose pliers, a carburetor cleaning spray (available at any hardware or auto parts store), a small wire brush, a clean cloth or shop rags, a container to hold small parts, and carburetor rebuild kit specific to your engine model (optional but highly recommended for heavily clogged units).
Safety supplies are equally important. Work in a well-ventilated area, as carburetor cleaner fumes are strong and potentially hazardous. Wear chemical-resistant gloves and safety glasses throughout the process. Keep a fire extinguisher nearby, since you will be working with fuel and flammable solvents.
Before starting any disassembly, disconnect the spark plug wire to prevent accidental engine starts. Drain the fuel tank or use a fuel shut-off valve if your equipment has one. Take photos with your phone at each stage of disassembly so you have a visual reference when it is time to reassemble everything.
|
| Step-by-Step Carburetor Cleaning Process |
Step 1: Remove the Air Filter and Housing
Start by removing the air filter cover and the filter itself. Most covers are held in place by one or two screws or a simple snap-fit. Inspect the air filter while you have it out. A clogged or damaged filter restricts airflow and contributes to carburetor problems. Clean foam filters with warm soapy water and let them dry completely; replace paper filters if they are visibly dirty or torn. |
Step 2: Locate and Remove the Carburetor
The carburetor sits directly behind the air filter assembly. It is connected to the engine via a mounting flange with two bolts or screws and is attached to the fuel lines and throttle linkage. Carefully disconnect the fuel lines, using needle-nose pliers to slide off the clamps. Note which line goes where, or take a photo. Disconnect the throttle cable and any choke linkage. Remove the mounting bolts and gently pull the carburetor free. |
Step 3: Disassemble the Carburetor
Set the carburetor on a clean work surface. Most small engine carburetors have a removable float bowl at the bottom, held in place by a single bolt or screw. Remove it slowly; residual fuel may drip out. Inside, you will find the float, the needle valve, and possibly a main jet. Remove these components carefully and place them in your parts container. Do not lose anything; these are tiny but critical. |
Step 4: Clean All Components
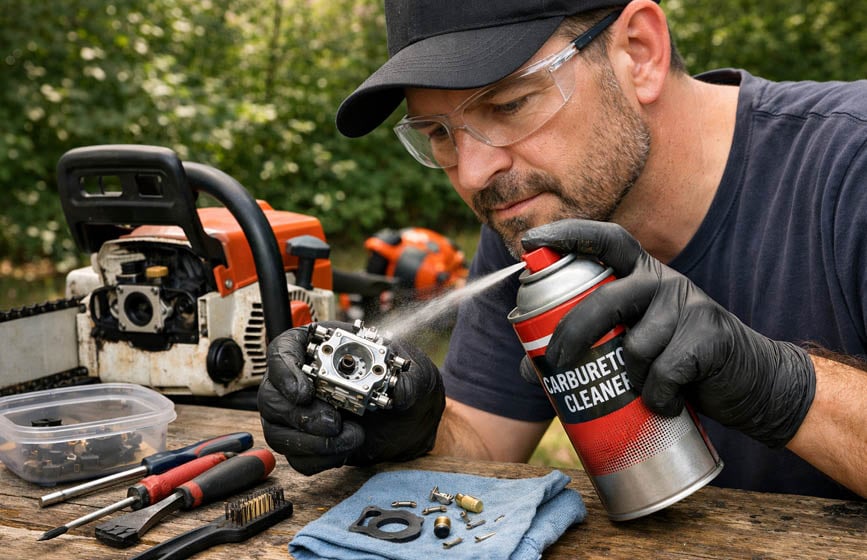
Spray all metal parts generously with carburetor cleaner and let them soak for a few minutes. Use the small wire brush to scrub away any deposits. Pay particular attention to the jets and passages; these tiny holes are where most clogs occur. You can use a thin strand of wire or a fine bristle from the brush to gently clear stubborn blockages. Do not use toothpicks or anything that might break off inside a passage. Spray cleaner through every opening you can find until the liquid flows through freely. Clean the exterior of the carburetor body as well.
If your carburetor has a diaphragm (common in many trimmers and chainsaws instead of a float bowl), inspect it carefully. Diaphragms crack and harden with age. A damaged diaphragm will prevent the engine from running properly no matter how thoroughly you clean everything else. A carburetor rebuild kit typically includes replacement diaphragms, gaskets, and needle valves for less than ten dollars and is well worth the investment.
|
Step 5: Reassemble and Reinstall
Once everything is clean and dry, reassemble the carburetor in reverse order. Replace the gasket if you have a new one available. Reinstall the float, needle valve, and float bowl. Reconnect the carburetor to the engine, reattach the fuel lines, and reconnect the throttle and choke linkages. Reinstall the air filter and cover. |
Step 6: Test and Adjust
Refill the tank with fresh fuel and attempt to start the engine. It may take several pulls to prime the system. Once running, listen for smooth, consistent idling. If the engine still runs rough, the carburetor may have adjustment screws (typically labeled L for low speed and H for high speed) that can be fine-tuned with a small screwdriver. Make small adjustments, turning no more than a quarter turn at a time, and test between adjustments. |
| Preventing Carburetor Problems and Keeping Your Equipment in Peak Shape |
Cleaning the carburetor is a fix for today, but prevention keeps you from repeating the job unnecessarily. The single most effective thing you can do is use fresh fuel and keep it stabilized. Add a quality fuel stabilizer to your gas can, especially if you are mixing two-stroke fuel for a chainsaw or trimmer. Stabilizer extends the shelf life of fuel and prevents the varnish buildup that causes most carburetor clogs.
At the end of each season, run the engine until it stalls from fuel starvation. This empties the carburetor of any remaining fuel so that nothing sits and degrades over the off-season. Alternatively, add stabilizer to the tank and run the engine for a few minutes to circulate it through the entire fuel system before storage.
Inspect and replace your air filter regularly. A clean filter keeps debris out of the carburetor and allows the engine to breathe properly. Check your fuel lines annually for cracks or brittleness; old lines can allow air leaks that throw off the fuel-air mixture just as badly as a clogged jet. Just as professionals recommend periodic maintenance for home systems, from HVAC components to air duct cleaning Park City residents trust to keep their indoor air quality high, your outdoor power equipment benefits enormously from a consistent, routine maintenance schedule.
Finally, store your equipment properly. Keep it in a dry, covered space away from moisture and temperature extremes. Moisture corrodes metal components and accelerates fuel degradation.
|
| Conclusion: Small Maintenance, Big Results |
| A clean carburetor is the difference between a chainsaw or trimmer that fires up reliably on the first pull and one that turns a simple yard task into an hour-long wrestling match. The good news is that carburetor cleaning is not a job reserved for mechanics. With the right tools, a careful approach, and about an hour of your time, you can restore your equipment to like-new performance and save yourself a significant repair bill in the process. |