 |
There is nothing more frustrating than pulling the starter cord on your lawn mower on a warm Saturday morning, only to hear a dull sputter and silence. Whether you own a simple push mower or a larger riding unit, a small engine that refuses to start is a common problem, and the good news is that most causes are easy to diagnose and fix yourself. You do not need to be a mechanic or spend a fortune at a repair shop. With a little patience and the right approach, you can have your mower running smoothly before the afternoon sun gets too hot.
This guide walks you through the most common reasons a lawn mower will not start, what to look for, and exactly how to fix each issue step by step. Keep reading, and you may be surprised by how straightforward small engine troubleshooting really is.
|
| Section 1: Start With the Basics, Because Simple Problems Are the Most Common |
Before you dive into anything technical, always check the obvious first. Experienced mechanics will tell you that a surprising number of "broken" mowers simply ran out of fuel or had a safety switch disengaged.
Check the fuel level and fuel quality. Old gasoline is one of the leading causes of hard-starting engines. Gasoline begins to degrade after about 30 days, and over a winter storage period, it can turn thick and leave varnish deposits inside the carburetor. If you filled the tank last fall and it has been sitting since then, drain the old fuel completely and refill with fresh gasoline. If your mower is four-stroke, also confirm the oil level is correct on the dipstick. Running a mower without enough oil will cause it to shut down as a protective measure.
Inspect the spark plug. The spark plug is the ignition point of the entire engine. Remove it using a spark plug wrench, which usually comes included with the mower or can be purchased cheaply at any hardware store. Look at the tip of the plug. If it is black and sooty, oily, or visibly cracked, it needs to be replaced. Spark plugs are inexpensive, usually under five dollars, and swapping one out takes less than ten minutes. Even if the plug looks okay visually, consider replacing it if the mower has not had one in two or more seasons.
Check the safety features. Modern lawn mowers have multiple safety switches designed to prevent accidental starts. On a push mower, there is typically a bail bar (the handle you squeeze) that must be held down for the engine to run. On riding mowers, there are seat sensors, blade engagement switches, and neutral safety switches. Make sure you are seated properly, the blades are disengaged, and the transmission is in neutral before attempting to start. A faulty or dirty safety switch is a common reason a mower seems completely dead.
|
| Section 2: Fuel System Problems and How to Address Them |
If the basics check out and your mower still will not fire, the fuel system is the next logical place to look. Small engines are particularly sensitive to fuel delivery issues.
Clogged carburetor. This is the single most common reason a lawn mower fails to start after sitting through winter. The carburetor mixes air and fuel in the correct ratio for combustion. When old, stale fuel evaporates inside it, the remaining residue can block the tiny internal passages and jets. The result is that fuel cannot reach the engine properly, so the mower will not start or will sputter and die shortly after firing.
The fix depends on how badly the carburetor is clogged. For minor blockages, a can of carburetor cleaner spray can work wonders. Remove the air filter cover, locate the carburetor (it sits between the air filter and the engine block), and spray carburetor cleaner into the throat of the carb while pulling the starter cord a few times. For more serious blockages, you will need to remove the carburetor, disassemble it, and clean each component individually. There are inexpensive carburetor rebuild kits available for most common small engine brands like Briggs and Stratton, Honda, and Kawasaki.
Fuel filter and fuel line. Many mowers have a small, inline fuel filter, which is usually a translucent plastic component sitting along the fuel line between the tank and the carburetor. Hold it up to the light; if it appears dark or clogged with debris, replace it. While you are at it, inspect the fuel lines for cracks, pinches, or hardening, especially if the mower is older. A cracked fuel line will allow air into the system, making it nearly impossible for the engine to run correctly.
Primer bulb issues. Push mowers with a primer bulb require you to press it several times before starting to push fuel into the carburetor. If the primer bulb is cracked or has hardened with age, it will not draw fuel properly. Replacement bulbs are inexpensive and easy to swap out.
|
| Section 3: Air and Compression, The Often Overlooked Culprits |
A small engine needs three things to run: fuel, spark, and air. Many troubleshooters focus heavily on fuel and spark but forget that a restricted air supply or poor compression can be just as problematic.
Dirty air filter. The air filter keeps dust and debris from entering the engine and damaging internal components. Over time, especially if you mow in dry or dusty conditions, the filter becomes clogged. A severely restricted filter starves the engine of oxygen, making it difficult or impossible to start. Foam filters can be washed with warm soapy water, rinsed thoroughly, and allowed to dry completely before reinstalling. Paper filters should be tapped gently to dislodge loose debris; if they appear dark and compacted, replace them entirely.
Interestingly, the principle of keeping air passages clean is important not only in small engines but in household systems as well. Homeowners who schedule air duct cleaning Park City services often find that improved airflow throughout their home makes a noticeable difference in overall system performance, a concept that applies equally to small engines.
Low compression. If you have checked the spark plug, fuel, and air filter and the mower still will not start, the problem may be internal. A small engine needs adequate compression to fire. Compression is reduced when piston rings are worn, a valve is stuck, or there is a blown head gasket. You can check compression with an inexpensive compression tester from an auto parts store. For most small engines, a reading of 90 psi or higher is considered healthy. Below 60 psi usually indicates internal engine wear.
A stuck valve is a common issue in engines that have sat for extended periods. The exhaust valve in particular can stick in the open position, preventing the engine from building compression. In some cases, you can free a stuck valve by carefully using a valve spring compressor, though this repair is more involved and may be worth consulting a small engine technician for.
Choke setting. The choke restricts airflow to enrich the fuel mixture during a cold start. If you leave the choke fully closed (the full choke or "start" position) and try to restart a warm engine, it will flood easily. Always use full choke for cold starts, then move to half choke or open as the engine warms up. A common mistake is forgetting to open the choke after the engine fires, which causes it to run rough and die.
|
| Section 4: Mechanical and Electrical Issues Worth Knowing About |
Once you have ruled out fuel and air issues, a small number of mechanical and electrical problems can round out your diagnostic checklist.
Flywheel key. Inside the engine housing, the flywheel is connected to the crankshaft via a small metal key that keeps them aligned. If the mower blade has struck a rock or solid object, this key can shear partially or completely as a safety measure to prevent major engine damage. A sheared flywheel key throws off the engine's ignition timing, making it impossible to start or causing it to backfire. Replacing the flywheel key is not expensive, but it does require removing the flywheel, which takes a flywheel puller tool and some patience.
Ignition coil. The ignition coil generates the high-voltage current that fires the spark plug. When a coil begins to fail, the mower may start fine when cold but die after it warms up, or it may refuse to start at all. You can test the coil with a simple spark tester; attach it between the spark plug wire and the plug, and pull the starter cord. A bright, consistent spark indicates a healthy coil. A weak, intermittent, or absent spark points to coil failure. Replacement coils are available for most engines and are a straightforward swap for a patient DIYer.
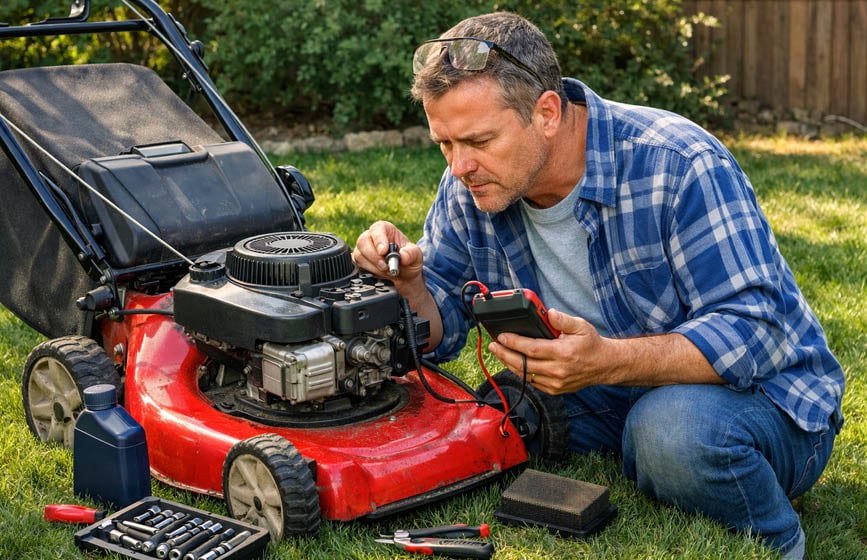
Battery issues on electric-start and riding mowers. If your mower has an electric start system that clicks but will not crank, or produces no response at all, a dead or weak battery is the most likely culprit. Test the battery with a multimeter; a fully charged 12-volt mower battery should read around 12.6 volts. If it reads below 12 volts, charge it and test again. If it will not hold a charge, it needs to be replaced. Also check the battery terminals for corrosion, a whitish or greenish buildup that prevents good electrical contact. A wire brush and a little baking soda dissolved in water will clean corroded terminals effectively.
|
| Conclusion: Take Action and Keep Your Mower Ready for Every Season |
Most lawn mower starting problems fall into one of a handful of predictable categories: old fuel, a dirty carburetor, a worn spark plug, a clogged air filter, or a small electrical issue. None of these are beyond the capability of a careful homeowner to address with basic tools and a little time.
The best advice, beyond fixing what is already broken, is to prevent these issues from occurring in the first place. At the end of every mowing season, drain the fuel from the tank and carburetor or add a quality fuel stabilizer. Replace the spark plug, clean or replace the air filter, and change the oil if applicable. Store the mower in a dry location and give the blade a quick inspection for damage. These simple steps, done consistently, will dramatically reduce the chances of a stubborn no-start situation next spring.
If you have worked through every item on this list and your mower still refuses to cooperate, it may be time to bring it to a certified small engine repair shop for a deeper diagnosis. Some internal problems, such as a scored cylinder or a warped head, require professional tools and expertise to repair properly.
|