ProParts Direct

The Battery Life Of A Snow Blower- What No One Tells You.

“Person
You will always need a snow blower to clear away all the excess snow during winter because, with one, snow cleaning becomes a smooth process. It all comes down to the type of snow blower that works best for you. If you live in an area that produces heavy snowfall, you may need to invest in a heavyweight snowblower that will take care of a large quantity of snow quickly.
Electric snow blowers, for instance, are lighter and quieter but may be less potent than your traditional ones. These are battery-powered but ideal for occasional small tasks that involve clearing snow. Cordless snow blowers are far easier to operate and are eco-friendly and maintenance-free.
No one talks about their battery life when it comes to snowblowers. In this article, we will tell you all you need to know about the battery life of a cordless snowblower. Let's begin.
How long does it last?
The average lifetime of a quality cordless snow blower will last around 15-25 years. This may vary depending on its maintenance and the frequency you use the snowblower. Regarding single usage, a battery charge will last around 45 minutes. If you are equipped with a high-powered one, 45 minutes is typically enough to clear up snow in all the important places for the day. If you're still left with snow, you can take a break as the battery charges before you begin the second wave of snow clearance.
Is it possible to increase lifespan?
The most effective way to keep your snow blower functioning as long as possible is to ensure that it's well-maintained and that you use it carefully. You can head to the nearest electrical parts store to stock up on maintenance equipment. Apart from maintenance, there are some measures and techniques you can adopt to increase battery life. Some of the best ways include keeping tire pressure up after each use, lubricating the machine, replacing parts before it breaks down, and cleaning out snow and ice to avoid blockage causing the blower to malfunction. No matter how much effort you put into your snowblower, inevitably, it will stop functioning at one point. Let's look at the signs to look for to know your battery-powered snow blower may be dying.
Signs
At a certain point, your snow blower will stop working, and you will need to prepare for next winter and purchase a new one. Preparing yourself is an essential step because you must be ready to save money to buy a new one. Additionally, a dying snowblower may not exert the same strength as a younger one, so purchasing one as soon as possible may be a good idea. When you hear strange noises from the engine, it may be a sign that it does not have much time to live. Smoke and sparks are other indications of a dying battery-powered snow blower.
Will a battery-powered or a Gas Snow Blower last longer?
Both battery and gas snow blowers operate in their unique way. You might wonder if the next snow blower you invest in should be battery or gas-powered, which will work more adequately to suit your cause and routine. To answer your question, A gas snow blower with a single gas tank typically lasts longer than a cordless electric snow blower with one charge. Battery snow blowers will last 45 minutes, whereas a gas-powered one will last 1.5 hours. Regarding long-term, both have a similar lifespan of approximately 15-25 years, and it all comes down to maintenance from there.
Some points to consider
Higher motor power will ensure better performance. A cordless blower offers 40 volts of motor power from one battery and 80V of capacity from two batteries, so choose your blower after assessing the amount of snow you'll need to clear. Also, always choose a lithium battery snow blower since those have the most extended runtime and lesser charge time. Besides these factors, consider auger width, blades, snow clearing rate, power source, etc., before purchasing the ideal snowblower.
To sum up
Battery life is an essential aspect to consider when it comes to snowblowers. A snowblower will last approximately 45 minutes, and its lifespan is around 15-25 years. You can also increase its lifespan by modifying tire pressure, lubricating, replacing parts, and clearing out snow inside the machine. You'll know a snowblower is about to die when it takes several attempts to turn on, may release strange sounds, creates smoke and sparks, or when it simply does not exert the same strength as it used to.
We hope this article has been informative and helps you understand everything about a snowblower's battery life. Thank you for reading!

Home Harmony: Inspiring DIY Projects for the Whole Family

“women with child painting
Home improvement tasks often conjure images of professional crews and serious renovations. However, there's a world of enjoyable, family-friendly projects that not only beautify the space but also reinforce familial bonds and enhance practical skills. This compilation offers inspiration for all ages to work together, learn, and create memories within the walls of their own home, ensuring that the process is as rewarding as the outcomes.
Reimagining Bedrooms Together
Turning a mundane task like painting a child's bedroom into a family affair sparks creativity and unites the family towards a common goal. Each member's input on colors and themes can transform the room while teaching about design and collaboration. As brushes glide over walls, conversation and laughter blend, transforming the space and weaving a tapestry of shared experience that outlasts the fresh coat of paint.
Constructing a Treehouse
A treehouse is more than just a play area; it's a vessel for imagination and growth. When a family decides to build one, they learn about planning, safety, and the satisfaction of completing a hands-on project. Children and adults alike revel in the accomplishment, knowing every board and nail contributes to a fortress of childhood dreams.
Growing a Garden
Gardening together is an opportunity for growth in more ways than one. Planting a flower bed teaches about nature, the environment, and the joy of nurturing life. It also enhances the home's aesthetic, giving each family member a tangible connection to the beauty they've helped create, fostering responsibility and environmental stewardship along the way.
Creating a Sandbox
Building a sandbox can be a simple weekend project with a delightful payoff. It offers a chance for young ones to play and older family members to showcase their building skills. The sandbox becomes a canvas for children's imagination while providing a practical lesson in construction and spatial planning for the whole family.
Organizing and Decluttering the Garage
Organizing the garage is a project that combines teamwork with the satisfaction of decluttering. It teaches the importance of maintaining an efficient, well-organized space. This project not only clears out unwanted items but also clears the way for new hobbies and activities, making the garage a hub of potential.
Personalizing Your Mailbox
Updating the family mailbox might seem small, but it's an easy way to introduce younger family members to the joys of home improvement. Selecting colors, designing, and painting the mailbox together can brighten the daily ritual of checking the mail. It's a quick, creative project that adds a splash of personality to your curb appeal and serves as a daily reminder of a project accomplished together.
Starting a Home Improvement Side Business
Launching a home improvement side business with your spouse can be an exciting venture that blends personal interests with entrepreneurial spirit. A well-thought-out business plan is essential, laying the groundwork for services offered, marketing strategies, and financial projections. Crafting a unique logo using an online logo maker can offer a professional look and represent your business effectively to potential customers. Together, these steps lay a solid foundation for a business that not only showcases your joint craftsmanship but also your shared vision and brand identity.
These projects prove that home improvements don't need to be outsourced to be effective—they can be a catalyst for family engagement, learning, and pride in one's living space. With these ideas, families can strengthen ties, build skills, and turn their home into an even more inviting place. The shared victories in these undertakings aren't just about the improved home, but the improved relationships and enriched family legacy that will echo through the laughter and teamwork of each project.
Looking for quality replacement parts for your mower, snow blower or small engine? ProParts Direct has you covered!
Image By: serhii_bobyk

Winter Storage Solutions for Outdoor Equipment

Woman writing on a carton box with a marker
Finding effective storage solutions for your outdoor gear becomes crucial as winter approaches. Keeping your tools and equipment safe from the harsh elements is not just practical; it's essential for longevity. This guide explores smart and efficient ways to safeguard your items. From garden tools to sports gear, we'll cover the best practices for winterizing and storing them. Equipped with these tips, you can rest assured that your equipment will remain in top condition, ready for use when spring rolls around. Join us as we navigate the ins and outs of winter storage solutions, ensuring your equipment stays protected and organized.
The Risks of Improper Storage
Storing your outdoor gear improperly in winter can lead to significant problems. Cold temperatures and moisture are the main culprits, wreaking havoc on metal, wood, and plastic. Rust and mold find their way onto your cherished equipment if left unprotected. Critters seeking shelter might also damage your gear, turning it into their winter home.
Properly securing these items ensures they remain in top condition, ready for use when warmer days return. It's not just about prolonging the life of your belongings; it's about guaranteeing their performance and reliability. Each piece of equipment has its specific needs for winter care.
For example, lawnmowers require fuel drainage, while bicycles need a protective coat against rust. Understanding and mitigating the risks associated with improper tool storage is crucial for maintaining the integrity and functionality of your outdoor essentials. Neglecting these steps could lead to costly repairs or replacements. Therefore, do this before the winter to avoid such issues.
Winter Storage Solutions: Preparing Your Equipment for Storage
As the chill of winter approaches, safeguarding your outdoor gear becomes crucial. Initiating the winter storage process for your lawnmowers, gardening tools, bicycles, and other outdoor paraphernalia requires careful preparation. First, thoroughly clean each item to remove dirt and debris. This step is vital for preventing rust and decay during the colder months.
Next, consider conducting minor repairs or maintenance. Fixing small issues now can prevent more significant problems when spring arrives. For items like lawnmowers or power tools, draining the fuel is essential. This step prevents the fuel from degrading and damaging the internal components. Remove and store batteries in a cool, dry place for battery-powered equipment. That preserves their lifespan and efficiency.
When dealing with tools and smaller items, organize them into categories for easy retrieval later. Finally, applying a protective coating or lubricant to metal parts can prevent rust and ensure smooth operation post-winter. Each type of equipment may have specific storage needs, so consult the manufacturer's guidelines when in doubt. With these steps, your equipment will remain in top condition, ready for use when warmer weather returns.
Choosing the Right Storage Solutions
Selecting the ideal storage solution for your outdoor equipment involves careful consideration. Primarily, you should determine the type of storage space needed. A spacious garage or shed serves well for larger items like lawnmowers or snow blowers. These options provide easy access and sufficient protection from winter elements.
However, when space at home is limited, renting a storage unit becomes a viable alternative. When considering this option, it's important to inspect the unit first and ensure it meets your needs. Inspecting a storage unit before putting possessions in it allows you to assess factors like size, security, and climate control. A climate-controlled unit is especially beneficial for sensitive equipment, safeguarding against extreme temperatures and humidity.
Interior storage solutions like basement shelves or utility closets can suffice for smaller tools and equipment. Organize these spaces efficiently to maximize their utility. Wall mounts or ceiling hooks can free up floor space, allowing for bulkier items.
Whichever option you choose, prioritize accessibility and protection. Your equipment needs a haven from the harsh winter weather and convenient access for occasional use or maintenance. Considering these considerations, you'll find a storage solution that keeps your outdoor gear safe and ready for spring.
DIY Storage Tips and Tricks
Embracing winter storage solutions for outdoor gear requires inventive and efficient approaches. Start by assessing your space; think vertically and use walls or ceilings for hanging bicycles or tools. Shelving units can brilliantly organize smaller items, keeping them easily accessible.
Consider repurposing everyday items for storage – old filing cabinets make great lockers for gardening tools, while clear, stackable bins can neatly store smaller equipment. Use hooks and pegboards for a customizable and space-saving solution; they're perfect for everything from hoses to helmets.
Try building a simple wooden rack for bulky items or use sturdy bins that can double as benches. Remember, labeling is key to maintaining order and finding items when needed. These tips optimize your storage area and protect your equipment from the harsh winter elements, ensuring they're ready for use when spring arrives. Keep your solutions adaptable and your equipment well-maintained for a hassle-free transition into the next season.
Maintaining Your Equipment in Storage
It's crucial to pay attention and care to maintain your tools in prime condition during winter storage. Therefore, ensure regular checks to spot any signs of rust or damage. This proactive approach prevents minor issues from escalating.
Equally important is controlling the environment where you store your gear. Strive for a dry and cool space, as excessive moisture or heat can cause harm. Depending on the climate, implementing dehumidifiers or heaters can be smart.
In addition, rearrange your items periodically. This practice not only aids in inspecting each piece but also helps maintain air circulation around them. With these steps, your outdoor gear will remain in excellent condition, ready for spring's call.
Closing Thoughts
We've navigated through the essentials of safeguarding your outdoor gear with effective winter storage solutions, emphasizing cleanliness, repair, and the right storage methods. Also, innovative DIY ideas and optimal maintenance practices during the colder months will ensure your equipment remains in top condition. Embrace these strategies to protect your valuable outdoor assets from winter's harsh elements. This approach extends your gear's lifespan and guarantees readiness for the next season's adventures.
Photo By: Ketut Subiyanto

How to Choose the Right Fertilizer for Your Lawn's Needs

“A
A lush, green lawn is the pride of any homeowner. However, proper fertilization is essential. The market offers a plethora of fertilizer options. Consequently, many homeowners are left bewildered about where to start. This guide aims to demystify the process of selecting the right fertilizer. It will give you the knowledge and confidence to make an informed decision. We will explore the various fertilizers available and provide insightful application tips.
Most importantly, we'll highlight common pitfalls that you should avoid. By the end of this article, you will have a clear understanding. You'll know how to choose the fertilizer that caters to the unique needs of your lawn, ensuring its health and beauty.
Understanding Your Lawn's Needs
Grass, like any other plant, has specific nutritional requirements. These need to be fulfilled for optimal growth. Different types of grass have unique needs. Therefore, it is imperative to understand these to select a fertilizer that complements your lawn. Conducting a soil test is a critical step in this process. It reveals the nutrient composition of your soil.
At the same time, it pinpoints any deficiencies that need addressing. You can easily perform a basic soil test at home using a kit from your local garden center. By taking this essential step, you ensure that your choice of fertilizer is perfectly tailored. It will meet the specific needs of your lawn, paving the way for robust growth and vibrant health.
Types of Fertilizers
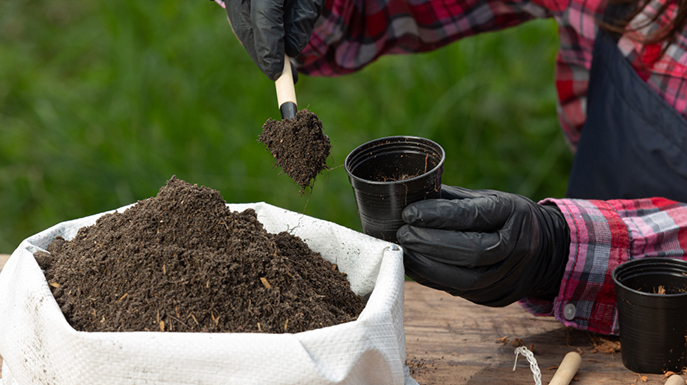
The fertilizer market offers a wide spectrum of options—these range from organic to synthetic varieties. Organic fertilizers come from natural sources, such as plants, animals, or minerals. They release nutrients slower, providing a steady supply over time. Conversely, synthetic fertilizers are manufactured products. They tend to release nutrients more rapidly. These fertilizers are rich in three main nutrients: Nitrogen (N), Phosphorus (P), and Potassium (K). Each plays a crucial role in plant growth and development.
At the same time, fertilizers can be categorized based on their release speed. Options include slow-release and fast-release. Slow-release fertilizers provide a consistent supply of nutrients over an extended period. On the other hand, fast-release options offer a quick nutrient boost to the soil. There are also specialty fertilizers available. For instance, there are winterizing formulas and weed and feed products. They are designed to address specific needs and challenges that your lawn might face.
The Role of Micro-nutrients in Lawn
Nitrogen, phosphorus, and potassium are the heavy hitters in lawn fertilization. However, micronutrients such as iron, manganese, and zinc also play pivotal roles. They contribute to the overall health and color of your lawn. Iron, for instance, is essential for chlorophyll production. It can give your grass that deep green color that is often desired. If micronutrient deficiencies occur, they can lead to a range of problems. These include yellowing leaves and stunted growth. Including a micronutrient analysis in your soil test can guide you. It can lead you to a fertilizer product that addresses these lesser-known but equally important nutritional needs of your lawn.
How to Choose the Right Fertilizer
Selecting the right fertilizer requires a thoughtful and informed approach. Firstly, you need to consider the specific needs of your lawn. Secondly, take into account the climate conditions of your region. And thirdly, consider the current season. Fertilizer labels are a treasure trove of information. They provide detailed insights into the nutrient content and recommended application rates. Understanding how to interpret these labels is crucial. It helps to make the best choice for your lawn. Applying the correct amount of fertilizer at the right time is paramount. It is key to achieving the desired results. Whether you opt for professional lawn care or the DIY approach, choosing your fertilizer is critical. It ensures the health and beauty of your lawn.
Application Tips and Best Practices
Safety should always be your top priority when applying fertilizer to your lawn. Firstly, ensure that you wear the appropriate protective gear. Secondly, use the right tools for the job. This approach guarantees an even application. It prevents potential damage to your lawn.
On top of that, it ensures that the nutrients are distributed evenly across the grass. After applying the fertilizer, it is important to water your lawn thoroughly. That aids in the absorption of nutrients. Subsequently, it ensures that your lawn reaps the full benefits of the fertilization process. Proper care and attention post-application are crucial. They maintain the health and vitality of your lawn. Remember, using the right equipment can make all the difference in your lawn care routine. It enhances the results of your fertilization efforts.
Enhancing Your Lawn's Aesthetic Appeal
To elevate the visual appeal of your lush, fertilized lawn, consider the strategic placement of decorative elements. For example, set outdoor furniture under a shady tree for a tranquil retreat. Alternatively, install garden lighting along walkways to provide a warm evening glow. You can add some decor here to create zones for entertainment and relaxation. Also, surrounding your lawn with colorful flower beds or potted plants introduces a dynamic contrast to the uniform green. That draws the eye and completes the aesthetic of your outdoor space. These decorative enhancements complement the health of your lawn and reflect your style.
Timing Your Fertilization: When to Feed Your Lawn
The timing of fertilizer application is as crucial as the type of fertilizer you choose. Your lawn's nutrient needs change with the seasons. As a result, your fertilization strategy should also evolve. In the spring, your lawn is waking up from dormancy. It can benefit from a higher nitrogen content to boost green growth.
In contrast, during the summer, your lawn might need fertilizing less frequently. That depends on the grass type and climate. As autumn approaches, consider a fertilizer with a higher potassium content. That helps your grass withstand the cold. A well-timed fertilization schedule optimizes plant health. Not to mention that it prepares your lawn to be resilient against pests, diseases, and extreme weather conditions.
Common Mistakes to Avoid
One of the most common mistakes in lawn fertilization is the tendency to over-fertilize. That can lead to nutrient imbalances and potentially harm your lawn. Similarly, using the wrong type of fertilizer is another pitfall to be wary of. It can result in suboptimal growth and health for your grass. It is important to adhere strictly to the recommended application rates and schedules. These are provided on the fertilizer label.
is not always better when it comes to lawn fertilization. Indeed, moderation is key to achieving the desired results. In addition, consider exploring innovative equipment options. For example, look at Michelin X Tweel Tires for your landscaping machinery. They enhance performance and efficiency in your lawn care routine.
Conclusion on How to Choose the Right Fertilizer
In conclusion, the journey to a lush, healthy lawn is a rewarding one, and choosing the right fertilizer is a crucial step in this journey. By taking the time to understand your lawn's specific needs and selecting a fertilizer that complements these requirements, you lay the foundation for a vibrant, thriving lawn. Avoiding common mistakes and adhering to best practices in application further ensures that your lawn receives the care and attention it deserves. Armed with the knowledge and tips in this guide, you are now well-prepared to make an informed decision, leading your lawn to its full potential.
Photo Credit By: FreePik

2015 © ProParts Direct. All Rights Reserved. Privacy Policy | Site Map Design & Development by The Scribbit The Scribbit - Marketing, Graphic Design and Web Development